Wednesday, February 3, 2016
Friday, September 11, 2015
Hair post: Getting your hair grey/silver & maintenance
Here we go! The post I had been procrastinating on for months loooo I finally sat down long enough (on a friday night nonetheless) and wrote this up.
This is your basic
Friday, March 27, 2015
My Hair Care Routine & Color Maintenance
If you've been on my friendslist since forever or have known me for a long time - or simply be following me on any of my social media platforms you can see how much my hair has gone through so many changes! Click 'read more' at the bottom of this to get to the nitty gritty of things!
***beware image and very text base heavy***
Wednesday, August 6, 2014
Makeup Tutorial: Reira Serizawa | Pink Gyaru

Wednesday, July 24, 2013
Matcha Green Tea Yogurt Mask
Forever procrastinating on finishing up the photoshoots to make a quick post on another DIY Face Mask thats super good for you! Matcha Green Tea Yogurt masks.
Another cheap and effective masks without breaking the bank. I made this masks for less than $4 since I already had most of the products at home minus the yogurt which I was out....
The benefits of a Yogurt Mask:
Fights premature aging on your skin and super hydrating for your skin as it contains lactic acid and also helps make your pores smaller.
Helps fight discoloration brought on by sun damage and acne scars as it naturally bleaches your skin to even out your skin tone and has natural anti bacterial and anti fungakl properties to fight off acne.
Benefits of MATCHA green tea:
The difference between regular green tea and matcha is basically green tea usually comes in packets and you let it seep through to flavor your favor to get the extracts from it. Matcha on the other hand is all that good stuff that comes in that little packets you use but finely grounded to a nice powder. Giving you all the the amazing benefits of it.
Matcha is rich in antioxidants and has a lot of anti inflammatory properties which helps keeps your skin young and youthful. Natural cleanser and exfoliant, high in EGCG which helps fight cancer. Smells great and a great mood booster. Love the earthy smell~ always puts me in a relaxed mood when I drink it or smell it.
So clearly when you combine them together you get great stuff. This has been my alternative to the oatmeal honey mask since that tends to clog my sink LOL....so if I do use it I have to rinse out in the kitchen sink u__ull
Making this is pretty much a no brainer. All you need are the following:
- Pure matcha powder (read the ingredients to make sure it only says matcha, you want it as pure as possible)
- Yogurt (plain unflavored - avoid anything with additional flavoring ingredients thats not natural as it might clog your pores)
- Tea Tree Oil or Rose Oil (optional - I like to use tea tree oil as its an added benefit for acne fighting and helps control oily ness, rose oil is great for that added extra bit of moisture and if you enjoy the smell of roses)
Take half a cup of yogurt, a table spoon of the matcha and your oils and mix! I like to make a decent sized batch and keep them in the fridge so I can use it 2-3x a week without having to keep making a new batch every time.
Leave it on your face for about 15-20 mins or till it starts to dry up, rinse it out with warm water. As your rinsing be sure to scrub it in so it helps to exfoliate your face as it rinses, its super gentle on the skin but if you have sensitive irritated skin I wouldn't be scrubbing that in too hard and would also avoid the tea tree oil especially if your sun burned....
Moisturize and your done!
Monday, January 21, 2013
Taobao Ring Review and How To
Was there anything wrong with the first agent I used? Nope, nothing! But I wanted to try out another agent just because. Not to mention Taobao Ring charges 8% fee versus the 10% fee that Taobao Spree does.
I initially wasn't going to switch to a new agent till my friend told me about this agent and I was poking through their website and was intrigued by how their system works and I was sold right away!
The downside to Taobao Ring is that they only accept USD currency and not Euro, but it looks like in the future they will start to accept it. And to break down how the payment method works - and this is straight from their website
The first payment includes the total items cost + their domestic shipping fee + our service fee, the second payment is for international shipping. The insurance fee is optional. Clients will pay 5% of all the cost (items cost + domestic shipping fee + our service fee + international shipping fee) if they want their items insured.Honestly, who doesn't like 40% off EMS shipping? Taobao Spree also offered me a good discount on my EMS shipping :3
For the first payment, the items cost is fixed while the domestic shipping fee ranges from 10 CNY to 15 CNY for the first 1kg, which depends on items' weight and the distance between sellers' location and our warehouse.
For the second payment, we provide many international shipping methods, such as EMS, DHL, airmail etc. EMS is highly recommended for its safe, quick, reliable advantages, and you can enjoy a huge discount up to 40% off.
Honestly, it beats having to type everything out in an excel sheet lol and sending it to your agent. This is an automated form that grabs all the information for you. All you need to do is enter the LINK in the box below and add additional information at the box below it as well. It even converts it from Yuan to US Dollars for you!
This is just an example screen cap for you |
Its also great that it shows you the status on of your item, if its still in pending status (checking if its instock), if its been ordered or if its in transit from the seller to your agents warehouse.
And like most agents, you don't need to pay for your items until they confirmed everything is in instock. And if its not in stock, they will refund you the price of the item.
After you confirmed all the items you want on your order. At the bottom right hand of the page theres a button that says 'confirm order' and it will take you to the page above which gives you the option to select shipping methods. And again it will show you the total of your order. Once your order is confirmed, it will go into 'waiting confirmation' status. You're not required to pay for the order yet. This is where the Taobao Agent will look through your order and then you wait till they send you an email confirming that everything looks good.
Here is my current timeline in terms of the ordering process, as anyone can tell you, using an agent or going through someone else is a lot of back and forth and communication.
Monday [1.14.13] - I put my order into confirmation status. I'm waiting for the agent to email me back or update my queue screen to confirm that everything is available from the sellers.
The agent will go through each of the items you selected, confirm with the sellers the items are available and will then update your status page.
Normally most agents will email you within 24hrs to confirm they got your order and will be processing it. But with Taobao Ring and their handy system it eliminates the need to email back and forth to check on the status of your order. But being the impatient little bugger that I was(seeing as I didn't get an email confirming they even got the order or if I did everything right)I went ahead and emailed them Tuesday [1.15.13] and within minutes of sending my inquiry in, I got a reply saying that they are just backed up on orders and will be processing my order soon. 10 mins later I get another email from them confirming their ready to take my money.
Being the excited little sucker that I am went ahead and paid for my order right away and got another email confirming my payment has been sent and everything is being set up for purchasing. But keep in mind though, when paying with Paypal, there is another service fee you incur when paying for your item.Where they do charge you about 3% fee (roughly another $2-3 more)
Give it a few days for your items to be purchased, received and process. Its about a 2-5 business days ordeal and when your items are receive, just check your "order manage" page and it will update itself. They will even include a photo of your items so you can see how they look like / proof its there. (I blocked out some of the items here and the photos but its there.) And from this point, it will prompt you to pay for the 2nd payment - shipping to you. And once again, when paying with paypal you are paying an additional fee. And since I chose EMS, it is a little hefty price for shipping considering they have to weight the items.
Once your items are paid for, your order will go into "shipping" status and give it another 24 hrs for them to process and ship your package and a tracking number will be given to you. Allow about 7-10 business days for the package to arrive (for the most part, usually EMS for me arrives within 5-7 but you just never know)
So far I've had a pretty good experience with Taobao Ring. After having to simply probe them in the beginning to begin my order but once it all got started it was smooth sailing.
Hopefully this has helped you, happy shopping!
Thursday, December 27, 2012
How to use Taobao & Taobao Spree (agent review)
What is Taobao?
Taobao is basically the eBay of China! And I freaking LOVE it. You can practically get anything and everything from taobao. From brand name clothing (mostly knock offs tbh), clothes in general to wigs, shoes and most of course the most popular items that people use this for; lolita and cosplay items!
The only catch with taobao is, as an overseas buyer you won't be able to purchase an item from them so you need to go through a shipping agent.
But there are a few taobao stores that will sell directly to overseas buyers; most of them are cosplay and wig shops. I'll link them in a separate post here
What is a shipping agent?
A shipping agent is basically someone who will BUY the item for you, get it shipped to their facility (there are several agents that service taobao and rakuten (rakuten is Japanese), you pay the agent a small fee and they will purchase or bid on said item for you and get it shipped to them and they will then forward you said items. But again, the cost of shipping is up to you.
Buying through a taobao agent also helps because a lot of agents get a certain % off shipping items and etc, which does help in the long run :D
Taobao is pretty simple to use honestly! I don't need to flood this posts with several examples on how to use it. And if your using GOOGLE CHROME, it gives you an option ontop to translate the page for you.
Be sure to keep ti on the first tab ontop for the default search bar, for some reason google chrome translates it to "baby" but, meh. IDK.
Things to watch out for on taobao:
Don't get too carried away by the cheap prices that they flash on your screen! The prices are all listed as Yuans and you convert them to US Dollars. The more the item weights, the more expensive shipping will be. So its usually advisable to order with a group so you guys can split shipping accordingly.
Things to keep inmind while shopping on Taobao:
The first rule on shopping on taobao; you get what you pay for. Not all the items you will see are the real deal, some are knock offs - good knockoffs and some are just bad. Inspect the photos well and just take it with a grain of salt and keep in mind you get what you pay for.
Secondly, cross reference the items you're looking for with other web shops such as eBay to assure yourself you ARE getting a good deal or whatnot. No sense in overpaying for a certain item and hassle of agents when you can find the similar item elsewhere on ebay for pretty much the same price. Your probably only going to save yourself a couple dollars in the long run. (granted, you do the whole back & forth with your agent and etc) but its all up to you. I personally love taobao for all the impossible to find Viviene Westwood items, or knock off Givenchy stuff lol.
-Wigs. Well, this is really a iffy thing. If your buying wigs, make sure your buying more than 1 or with a group. I suggest just doing a giant wig haul because the cost of wig + agent fee + shipping to the agent + shipping to YOU will cost you a hefty price if your just ordering ONE Wig. If you ARE ordering a few wigs, try to order from the same seller to save yourself the shipping.
What I love about wig shopping on taobao is the fashion wigs. They give you more variety and choices in terms of fashion wigs. I wouldn't order cosplay wigs from taobao directly I would first go do a search on ebay and see if I can get the same item for pretty much the same price and without the hassle of an agent or check the list of taobao sellers willing to sell direct. But with most of those shops, they will only charge EMS. And nothing else!
-Shoes, these tends to be a total hit or miss on both quality and price. Taobao is the place to go if you're looking for some Vivienne Westwood Winged Sandals and don't quite have the $200 to drop on the real deal. Or if you're looking for those Jeremy Scott teddy bear shoes that are forever sold out on eBay.
but keep in mid, shoes tends to weight the most and so shipping will automatically cost you pretty much as much as the shoes are, but it could depend really. I suggest browsing through lovelyshoes.net first if you're just in the mood to browse for shoes and style and not necessarily a specific model and brand. Their prices are competitive and cheap, quality is good (you get what you paid for, I have a review for lovelyshoes.net here) you dont need an agent to shop with them. But if you ARE looking for a specific brand, make and model. By all means, taobao will be your new bff.
-Lashes or Makeup. Unless your buying Anna Sui, you might as well go to SASA.com for your beauty items. Since you don't need to use an agent with SASA.com
-Costumes. Sometimes it is advisable, but again, I suggest shopping around the internet for cosplay shops before settling down on ordering from taobao. Sometimes the quality of costumes from a taobao shop is nicer than what your typical cosplay shop carries.
And sometimes you just can't find the right item you're looking for on ebay. Then best to do a group order.
Or consider looking through shops that sells directly to the US (see list of stores below)
-DVDs and electronics. Remember that most dvds and etc are region locked. Your better off ordering from CDJapan or YesAsia! Since you gotta consider the fees that goes into ordering from Taobao and an agent.
Searching for specific items on taobao:
If you're not a native chinese speaker or can read/write. Google translate is your best friend Try and break down the words or key words to help narrow down your search a bit more.
How to use Taobao agents:
On my first order from Taobao that I did on my own I went ahead and did a google search for Taobao agents, yes I went on a total shot in the dark and the first thing that popped up was Taobao Agent
but of course I didn't take a complete gamble, I went and did another search for reviews for said agent, and I found one from the egl community on Livejournal. Those girls are probably the hardest people to impress lol since they look at every single little detail LOL
So I took a shot at it, I followed their website instructions on How to Order and whatnot, which is really simple. They even have a form on their website you can download and fill out or you can make your own list.
You simply list down your information, the items you want (a link to it as well) and some more specific details about the item. Such as style, color and size. And you list down the price in Yuan and the shipping for said item.
Here is an example of what an item would look like if you're doing an order. I also went ahead and did a screen cap for the translated version. Even if the translated version is showing $ its still in Yuan prices.
So when filling out the order form (I highly suggest going through with their order form because its so much more organize and breaks down all the prices and etc for you, their order form is in excel format as well)
You would note down a link to the item, style, sellers name (Which I didn't get on the screen cap but its usually on the right hand side right above the diamond icons) if you are unable to fill out that portion, your still ok. The agent will probably fill out the rest of the info but its best you fill it out to the best of your ability)
and the portion that says 'express' would be the general shipping cost for the agent. The agent sums up all the cost for you and sends you a final quote for all the items, including their discount and their shipping fee.
My agent at the time who was helping me was very nice and communicated well and answered all my questions promptly and kept me in the loop. As soon as I sent in my order form, I got an email within 24 hrs and likewise with any questions I asked. You even have an option of talking with them over Skype!
And once all my items arrived to their office, she was even kind enough to take photos for my items and send them to me. After all your items arrive to them, they send you another quote for the shipping. Giving you options as far as shipping goes.
Airmail, which is the cheapest but clearly takes the longest. Can take up to months! EMS and Express.
The later options clearly would cost you a prettier penny but they arrive quicker and requires someone to sign for said packages to insure its not lost at all. Your agent will also go ahead and give you a tracking # for the items.
I asked for EMS shipping on my items, was overcharged by a few dollars but the agent quickly notified me that they got a cheaper deal on the shipping and quickly issued me a refund to my paypal account. I got my items within a week and a half of it being shipped out. It was well packaged and everything was safely wrapped in bubble wrap.
I had no problems communicating with my agent at all despite the usual language barrier. She was polite and answered all my questions promptly. I would probably go and use TaobaoSpree again as my go to for shopping with Taobao.
I hope you find this post informative and happy shopping!
Monday, November 19, 2012
Studding!
Some tips and tricks I learned when working with studs and where to BUY studs.
-Ebay, I buy all my studs off ebay, thats where you can also buy bulk of some screw back spikes. I have an order of CROSS studs coming in, in the mail as well as some spikes too. Some sellers, if you look real hard even carry Butterfly and skull studs. Some in different colors too.
-I also tried using those 3D nail art stuff, they dont have a clamp on the back and you'd need tacky glue to glue them onto clothes.
-Studding works best on KNITS and pleather fabric. If you're working with studding leggings. Don't do what I did:
You can get these iron on patches practically anywhere, Target, Walmart, Walgreens, etc. At the sewing/repair section.
Next suggestion is, if you DO want to stud the crap out of your leggings, is to do a patch. Like so:
Available from Carrie's Store via Store Envy |
Friday, September 7, 2012
218. [Cosplay] Makeup 101 Glossary - Face Stuff
Here is also another article I stumbled upon online; Basic Information about cosplay makeup by Sado
But not a lot of these articles or even most makeup gurus don't really go into much lengths on what each product does - or can do. This most is mostly going to be dedicated to all my male cosplaying friends and those who are just getting into cosplay and whatnot. There are hundreds of other videos and tutorials about this on youtube that you can simply do a quick search on but I guess this can be you quick 'guide' or 'glossory' as to what each product does - can do, and etc.
I won't go into lengths on application - again, youtube videos will be your best friend :D
And just 'coz your starting to wear makeup or cosplay does not mean you need to break your bank by getting super expensive high-end products, but again. You would know your skin better than anyone and I would suggest maybe trying these products out a few weeks prior to know what can break you out and what doesn't /: no one wants to spend a whole weekend at a con only to find out the makeup they wore for day 1 cosplay ended up breaking them out! There are quite a few drug store products and brands out there that are practically on par with most High-End brands, its just finding the right one that works for you!
Lets get started....
Primer: Putting your makeup on is like painting your face, your face is your canvas and like with any canvas you have to PRIME the canvas to make sure the paint lasts and looks as good as it can be. And for this, Primer is your best friend. Make up primers are usually contain max, polymers, and silicones - you have to read the back label to see exactly what each one contains. Primers help smooth your face out and helps fill in ridges with deep scarring to help make applying the foundation over the face smoother and helps last it longer and helps keep your oily face at bay!
Primer comes in different colors - most to help cancel out undertones or in clear complexions. Concealers also comes in different color tones meant to help even out skin tones as well, but if your looking for an all over cover. You can get yourself a primer that comes in a color tone meant to cancel your skin undertones.
Some are even advertised as 'moisturizing' and are 3-in-1's...there are so many out there.
Finding the right primer for you: Do your research ): is all I can say....
I personally have oily skin and have terrible red undertones so I like to use a green based primer to even out my redness, if you have yellow undertones you might want to use a lavender based primer. Or if you just have dull skin you can try using a swallow colored peachy one to help brighten your skin up (this works if your primarily fair skinned)
Concealer: Your best friend when it comes to hiding all those dark circles from late night sewing parties! Also amazing at covering up imperfections that foundation just can't cut!
Concealer works by targeting all those super pigmented areas that you want to cover up. Comes in creams, sticks and powder formulas much like foundation. But it gives a medium to heavy coverage as its purpose is to CONCEAL. And much like primer, it also comes in several shades. From skin tones to swallow peach, yellow and purple as well as green tones specifically to target really stubborn areas that needs some good coverage. Also the good thing about concealers are, a lot of them can come medicated to help heal and cover up acne flare ups.
Foundation: Consider this the next step to your 'paint' project.. And probably one of the most important things when it comes to cosplay photography and cosplaying in general - is to come out looking your best and to make your face as flawless as possible. But lets face it (no pun intended) we're not perfect but this helps give us that effect (the rest is up to Photoshop LOL)
Foundation helps even out your skin tone, covers up imperfection, and also helps make you 2-3 shades lighter (depending on what shade you wear)~
Foundation comes in different types and forms - application is more or less the same.
The most basic form foundation comes in are the following 3; powder (loose or pressed), liquid or cream/mouse.
And recently theres new airfoam foundations that have hit the market - I would not recommend these as when they oxidize, they tend to turn a different color and just does not give as even of a coverage.
Powder: Powder foundation comes in 2 forms - loose and pressed. Loose meaning their not compressed in a pressed powder form (as shown above). Most comes in a small container like the one above and has a sifter inbetween to keep the product from going all over the place and making a HUGE mess. And for the LOVE OF GOD PLEASE DO NOT PRY OFF THAT PLASTIC SIFTER THING D8 ITS THERE FOR A REASON!!
(I had a friend pry that shit off coz they didn't now it was part of the packaging and needless to say it was terrible). If you get yourself one of these loose powers, just simply tip it up side down and TAP some of the product loose onto the lid it came in, and use a brush or sponge to transfer the product onto your face.
powder foundation is best to use if you have oily skin and aren't looking for something with heavy coverage. Loose powder gives a light finish and does not cover as much imperfection nor does it do much if you're trying to go a few shades lighter than your actual skin tone. I prefer to use loose powder or powder in general to help set my liquid/cream foundations.
If you have DRY skin and prefer the lighter feels of powder - just put moisturizer before applying your foundation and you should be good and helps avoid that cakey effect.
Liquid: As the name suggest lol liquid foundation is probably the most popular form of foundation used and provides the most coverage. Easily medium to heavy coverage depending on the formula and I'd like to say the best to use when it comes to cosplay - especially if your looking to look a few shades lighter and is the easiest to work with. But also melts off the fastest lol, so, prime and set!
Cream / Mouse: Cream foundations are amazing and provides a medium to heavy coverage and very build able. It can be applied with your fingers, a wet sponge, or just a spunge or a brush. I usually find the best ways to apply these (also depending on its thickness) are with foundation brushes and wet sponges especially if it comes in a very hard pressed packaging.
Its mouse counterpart - popularized by most drug store brands boast a light weight airbrush finish. Best applied by hand, and I suggest exfoliating and moisturizing before application as it can settle into the fine lines of your face and really pronounce dry areas x_X which you most definitely want to avoid especially in photos.
BB Cream: Also known as blemish cream, beauty balm and etc...., its a light to medium coverage 'foundation' popularized in Asia for its skin healing benefits. It was originally developed in Europe designed for patients who underwent surgery and still provide coverage for patients who can't wear foundation (mostly after laser surgery and whatnot as foundation contains chemicals in it that might not be too good for your damaged skin). BB Cream is pretty much a tinted moisturizer with skin beneficial properties; such as anti wrinkle, whitening and SPF protection.
I personally avoid using this for cosplay photography - unless you have perfect awesome skin LOL
since this gives such a light to medium coverage. Some BB creams are buildable but are designed for super light skin people, if you have yellow undertones, you might want to avoid BB creams unless you can swatch test them yourself and this mostly comes in 2 shades - light and SUPER light. /:
Only Misha is the only one to my knowledge that carries 3 shades and is what I personally use on my days off - or when I'm at work LOL coz I don't need to necessarily cake my face on.
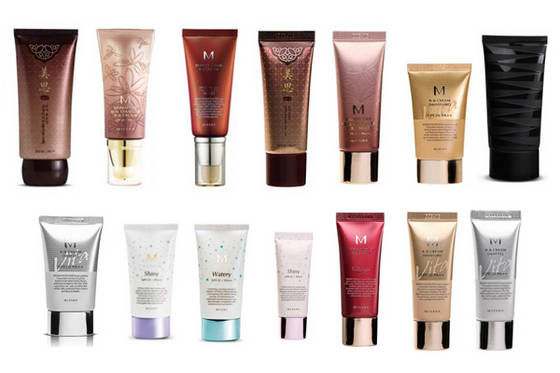
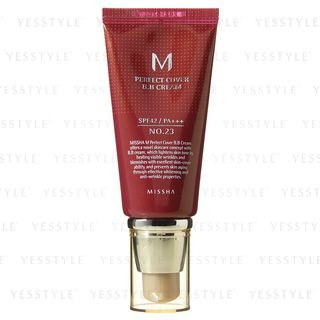
BB cream also gives you a very dewy finish - which works for some and might not look TOO flattering on others. Always best to do a makeup test with this stuff. Sometimes the dewy finish can work to your benefit as you can skin the highlighter lol but I always suggest powdering this down to set and keep it from giving a overly dewy look.
Also one thing to note - BB cream tends to oxidize after wear and can cast a ashey overtone to your face. So if you are using BB cream as your foundation of choice, do a photo test. With flash, without flash, indoors and outdoors but be sure to give it a few mins to let it set and oxidize before attempting your face test just to make sure you don't look like a ghost in your photos.
(for more info on BB creams, click on the image above to be directed to a blog that breaks down all the different BB creams on the market right now if you're looking to try it out :D)
What is contouring? What is shading? Highlighting? What the hell are you talking about woman?!
Contouring or shading is basically adding a darker color or pigment to certain areas in your face using a darker color as if creating a shadow to help /contour/ your face to look slimmer, make your cheeks more pronounced. Same as with HIGHLIGHTING. Highlighting is directing more light and focus to certain key points in your face.
You can search youtube for several tutorials on proper contouring and shading.
Bronzers: (also known as contouring powder) When people think of Bronzers, they think 'ugly sun burned skin' lol, thats probably because most people go over board with bronzers. No honey, you don't want to look like a bronzed up greek statue.( Chances are, you are no Adonis to begin with, lol, but lets be real)
Bronzers are easy ways to help fake a tan, a lot of the time you can get this in MATTE finish or a shimmer finish. For cosplay, I always suggest staying away from anything that shimmers. Especially if your using it for contouring and shading. Matte is always your best friend especially if you're going to be using highlighting shades....
**Tip: you can use matte eyeshadow to double as a contouring shade or use a darker shade of foundation as well, you DON'T need to buy a whole set of powders if you don't need to***
Highlight: This is the shimmer part of your palette. This is mostly used to highlight parts of your face where the light hits it just right, it helps bring attention to the right parts of your face.
Mostly comes in powder form like the bronzer. Comes in light colors such as white, cream and are mostly pretty translucent not too pigmented since you want to blend it.
Blush: There isnt much to talk about blush, it goes on the apples of your cheeks to give you some color, a nice peachy glow or rosey cheeks. It also gives a more feminine look to your cosplay if your looking at crossplaying as a girl XD (if your a guy, I mention this since I wrote this article with the intent to educate most of my guy friends lol)
The fun thing about blush is, it comes in so many forms and shapes as well! It comes in cream/mouse, LIQUID (its very runny and watery not like foundation), sticks and of course powder.
***Tip: you can use lipsticks as blush too! Best applied with your fingers as the heat from your hands will make it more pliable***
Wednesday, August 15, 2012
214. Red Hair 2 - Maintenance and Products
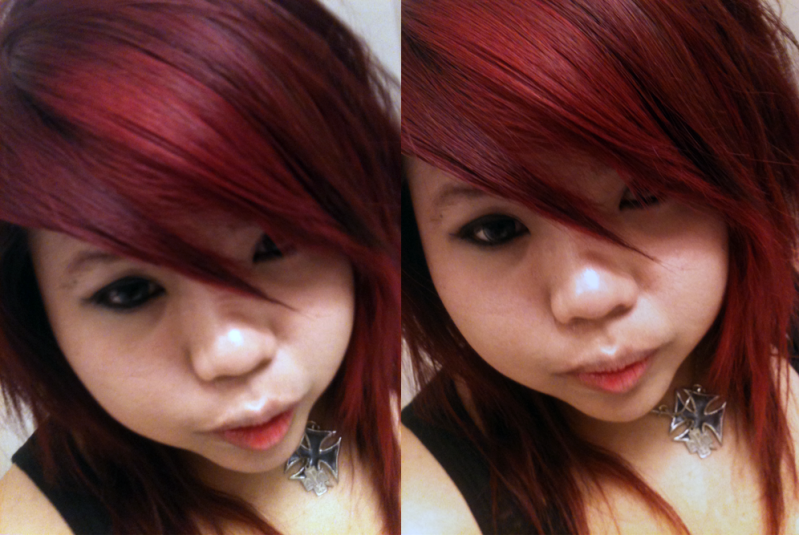
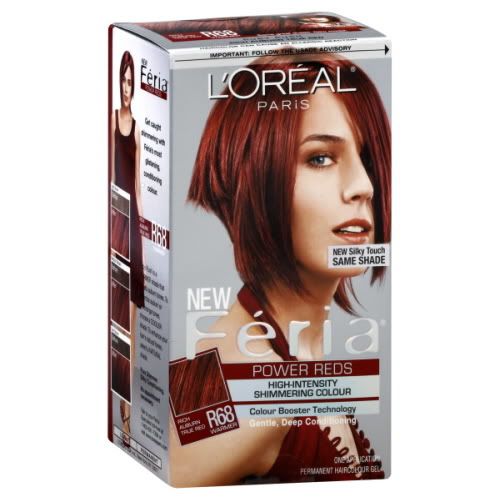
Tip: If you insist on getting a red red shampoo and can't find John Freida, Sally's carries Quantum Riverting Reds Color Replenishing Shampoo and Conditioner which actually comes in a very vibrant red shade when dispersed from the bottle, but as a red nazi I still prefer to mix a bit of red filler and manic panic just to really keep it RED *u*
- John Freida Radient Red - Averagely $6.46 (each) Shampoo & Conditioner
- Quantum Riveting Reds - Averagely $7.39, $5.50 with a Sallys Card (sign up for newsletter from Sally's to get 25-50% coupons as well!)
- Beyond the Zone Street Glaze - product advertises as a glaze shiner to help make your hair shiny and etc and also redeposit color. Don't waste your money /: this doesnt help add softness or anything at all, since I used it thinking it would substitute for conditioner, or something since I don't want to drown my hair in products and I don't want to do a conditioner THEN a glaze shine over it. Yeah, don't bother, your better off doing what I was doing above lol. And if your hair is dead from bleaching prior or just everyday wear and tear on your hair....refer to product below
- Tresemme Nourishing Rituals Cashmere Touch Serum - Just for the ends if your hair is dry from having to retouch with dye and heat styling, its pretty lightweight and I haven't had any problems with it fading my color at all! This might be a dupe for Ion's Cashmere Touch serum as well.
- Suave Dry Shampoo - I've tried the Tresemme one and the Got2be dry shampoo and nothing works as well as this baby. I would avoid the FOAM versions of 'dry' shampoos even if they say 'no water' its still pretty well )': and doesn't work that well. If your ends or the shaft of your hair is oily as fuck, you CAN use it, but I wouldn't recommend the foam versions on your roots, the dry spray version is also amazing at giving you volume lol
- SPLAT LUSCIOUS RASPBERRY - retails about $10 at most local drug stores in the US...stains EVERYTHING terribly =A=ll and it gives your hair a more PINK shade than a true red.
- Feria - MY HOLY GRAIL OF ALL RED HAIR DYES LOL. FOREVER DEDICATED TO THE "POWER REDS" LINE *u* I always always always get the box version, I've tried using the one you get at beauty supply shops and I dont know, it just doesnt give me the same result, it could be the serum that comes with the box. And my go to shade in the Feria line is always RUBY RUSH.
- Ion Color - I use the 7RR from the Ion Hair Color Line when I cannot find Feria anywhere
- ShimmerLights Red - Wouldn't recommend it, its meant for brunettes with red undertones. Not true red head.
Thursday, May 31, 2012
198. Makeup & Skincare for Cons/Photoshoots
Wednesday, February 8, 2012
Vanilla Matcha Cookies

Yay me, look whos trying to be all productive and stuff?! LOL
More like, look whos trying to be cool and being all 'I'm going to update this blog more often' type deal....so fail. I really have not much to talk about HAHA...
Other than, I really really really need to start sewing or working on costumes HAHAHA or build my new BB Gundam so I can allow myself to get another one o__olll
yeah right, as if that'll happen .___.ll ugh. Cramped neck. stupid pillow. Ah, moving on!!!

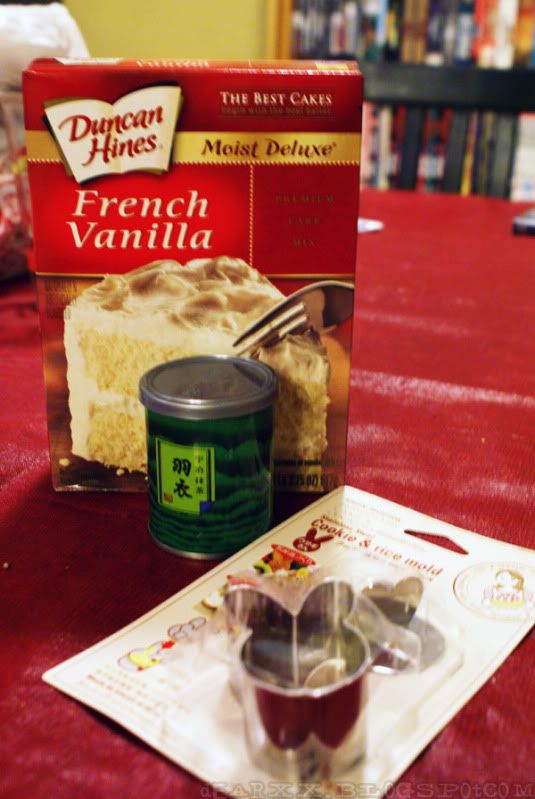
For thise ghetto recipe you're going to need....5 ingredients ONLY! :D and is going to be super easy! Prep time is under 20 mins! :D hurhruhur
I have 2 variations to these Vanilla Matcha cookies actually, this particular recipe only calls for 5 super super super simple ingredients - perfect for people staying in college dorms - granted you have access to a toaster LOL or a oven and don't want to be storing all sorts of ingredients that you're probably going to barely use; ie: baking soda, flour etc etc. Right? :D


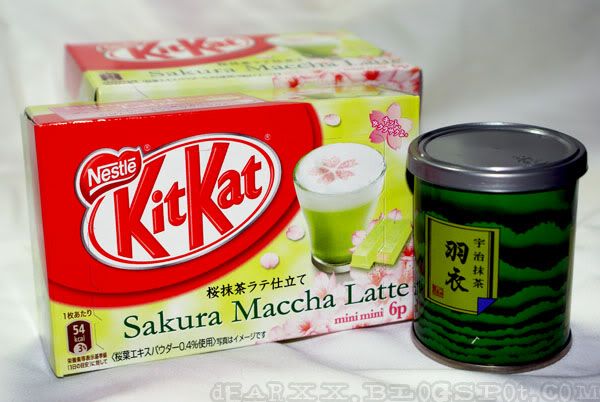
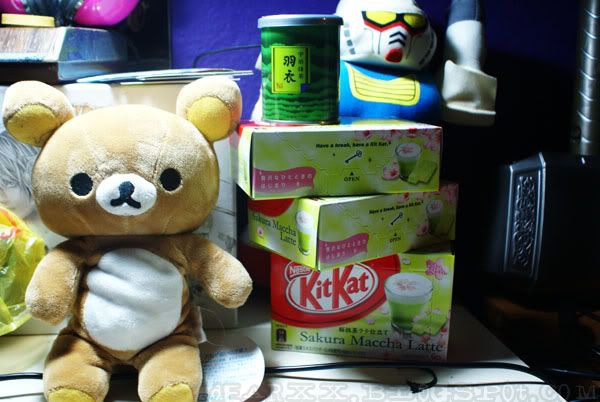
The inspiration for these lovely cookies, are, of course the new Kitkat Sakura Matcha cookies, unfortunately I dont have sakura extract - its real. Trust me, I've seen it. Unfortunately I have not been able to find a seller that carries it internationally. If push comes to shove I might be super desperate enough to try and shopping service HAHA.
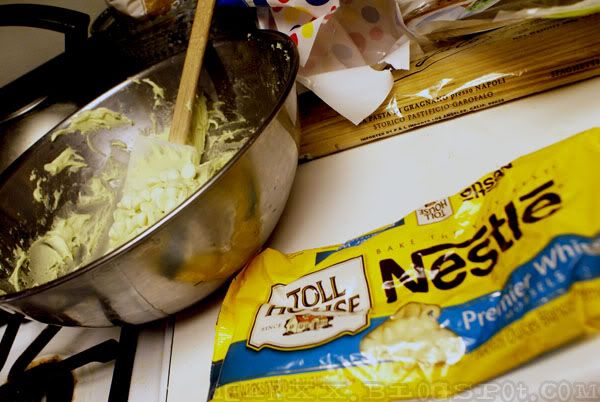
Ingredients:

wont allow you to use a cute cookie cutter /: the next one I'll be posting - will tho! :D
this recipe produces a soft moist cookie, crunchy on the outside but nice, soft and moist on the inside and goes amazing with
Matcha Latte or just green tea in general. Or, if your a cookie purist - MILK!
- CAKE MIX - yes, I'm dead serious. I told you this is going to be super easy to make and does not call for a lot of ingredients that most people - unless you're an avid baker. Wont really have!
- 2 Tablespoon Agua (Water)
- 2 Eggs
- 1/2 Vegetable Oil
- Matcha Powder (Green Tea Powder). For this recipe I used about 3/4 of a teaspoon of Matcha (you can adjust how much matcha you put depending no how strong you want it to be)
- White chocolate chips - optional (you can get chocolate and chop it up yourself, but I prefer the Hersheys chocolate chips since they dont exactly MELT and DIE in the oven like other chocolates might...)
- Vanilla Extract - Optional
Preheat your oven to 350 degrees 8D
All these ingredients - minus the matcha can be bought at Target and all should run you under $10! 8D
The reason why I'm using a cake mix is, as I explained, this particular recipe calls for people who don't always own the essentials to baking and this is just for someone whose looking for something super fast, quick and easy to snack on.
You can get Matcha powder from your local Asian Market, just be weary some Matcha can from Thailand, China, Japan. Etc...I don't know how the taste would vary to be honest since I am no Matcha offinado lol and I prefer my teas to be on the stronger sweeter side. So I am by no means, an expert on knowing pure matcha and etc.
I got mine at Marukai (a Japanse market, like Mitsuwa and Nijiya)- or if you don't have access to one, you can simply purchase them directly via eBay or Amazon, I just picked up any POWDERED matcha I found. Granted they run alittle pricey...this tiny tin can cost me almost $10. (It was around $8somethingsomething) but a little goes a long way!

I'm not sure what the name is exactly of this brand, it seemed like its one of the more generic ones anyway. Don't be fooled by the amount you see, when you first open it, its sealed completely with a metal can opener thing. Open that to reveal your matcha in a bag - to help preserve freshness and keep it from being a mess!
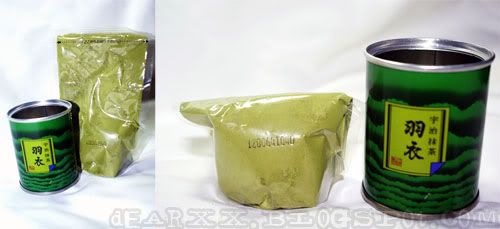
Just be careful when you open the bag, I'd snip just a tiny tiny bit on the side to let some air out, this will also help move most of the powder DOWN to the bottom of the bag and not stick all over the place and make you waste a bunch of that precious matcha powder.
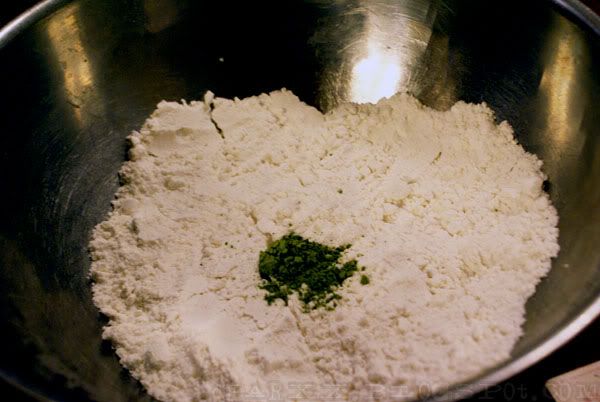
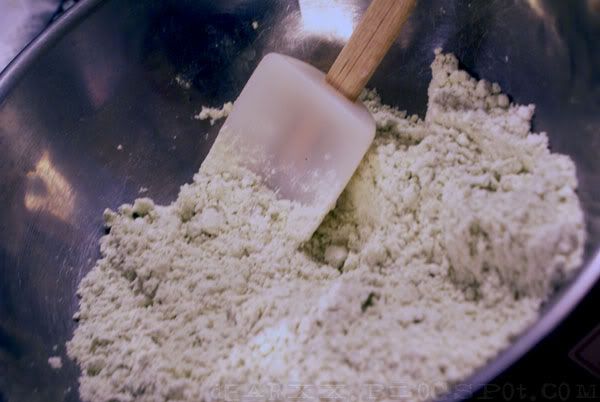
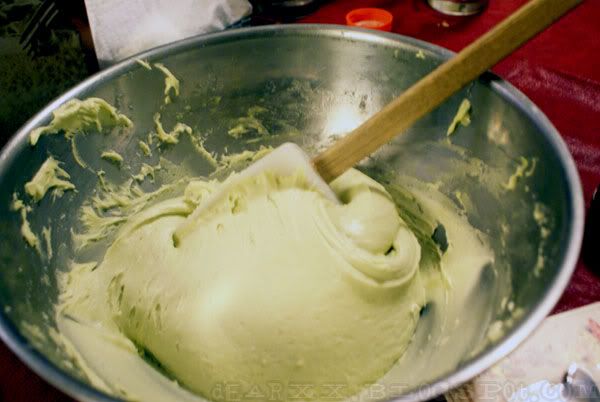
So with your ingredients assembled. Combine the Dry Ingredients together! LOL

Pour all your cake batter into a mixing bowl and drop about a teaspoon of matcha, for this recipe...I used about 3/4 of a teaspoon of Matcha since I wasnt sure how strong I want it to be. You can add less or more depending on how strong you want the green tea to be.

Mix the dry ingredients together. Also, I'd suggest using a fork or a whisk to combine the dry ingredients together.The point is you want to avoid any clumps of powder forming and you want to break it all apart so you dont have to deal with them later on when your adding the wet ingredients. If you want you can just run it through a strainer as well.

Mix your wet ingredients onto your dry ones! Mix mix mix mix 8D it should turn it into a nice soft green color~ obviously its gonna be more green color the more matcha you add.
At this point you can also decide if you want to add Vanilla Extract if you want a stronger vanilla flavor. I feel like this also helps create a smoother 'matcha latte' feel/taste.
Also, if you are NOT using a 'french vanilla' cake mix like I am, it might be a good idea to just go ahead and add some vanilla extract in there anyway


again, optional~
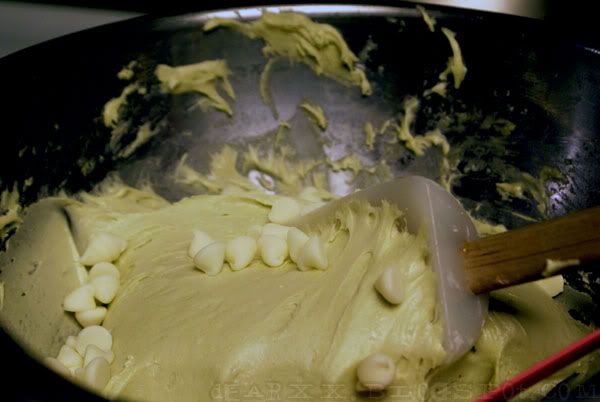
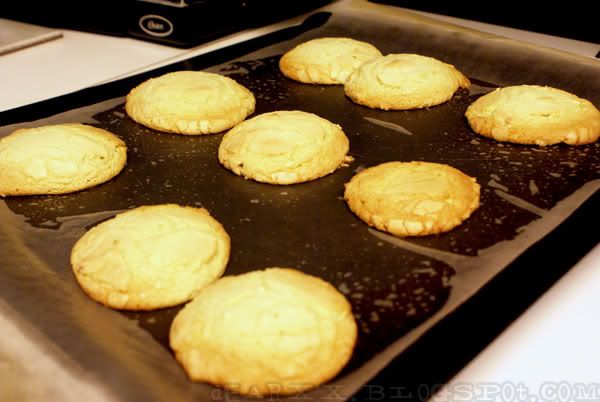
Now you want to line your cookie sheet with wax paper - this will keep the cookies from sticking, I wouldnt suggest putting PAM on the cookie sheet as it will actually make the cookies deflate and spread out! So if your going to skip out on the wax paper - be sure you are using NON STICK cookie sheets - my cookie sheets are both non stick but I still prefer using wax paper - makes clean up faster.
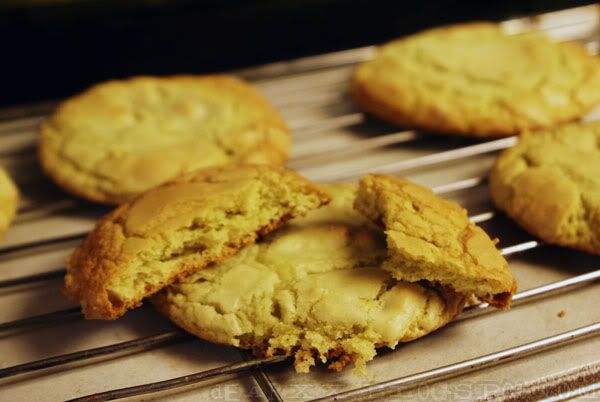
Roll them into balls or use a ice cream scooper or melon scooper - I wish I had one, so the cookies would be smaller and cuter ;A; and plop em onto your cookie sheets. Bake for about 8-10 mins (this honestly differs depending on your oven so I just suggest keeping an eye on them, when the edges start to brown up or the top. Their done!)

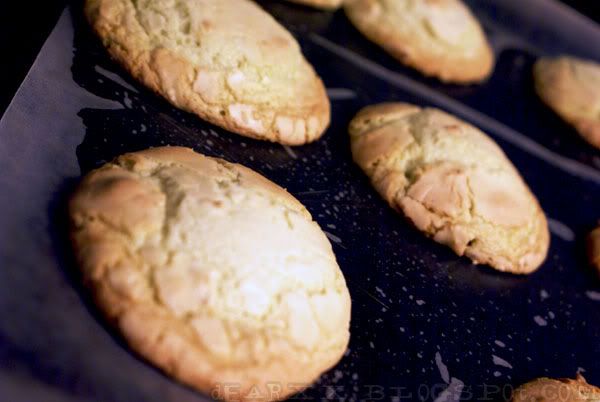
Pull them out, let them sit and cool on the sheets before removing them or you will break them up! I like to let mine sit for about a few mins before I transfer them to a cooling rack. I'd say 10 mins should be plenty enough - but if you live in colder environments then yeah. Haha

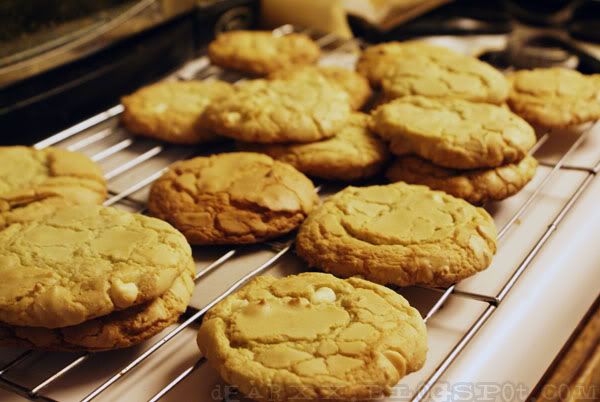
Let them cool, and ENJOY! 8DDD Best enjoyed with a nice tall glass of milk or better yet, matcha milk tea~
The next post I will hopefully be making is to show you another Recipe for Matcha Cookies - this one will allow us to use cute cookie cutters! HAHAHA 8D
And possible a Matcha White choco latte
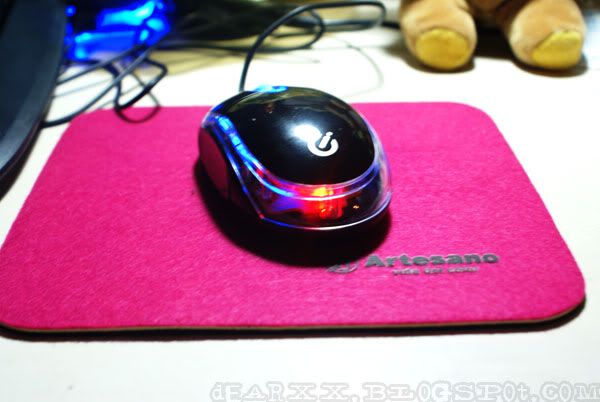
looool PS, I finally got a legit mousepad HAHAHA NO more using ghetto paper LOLOLZ ohmygawd. Yay marukai for $1.50 mousepads xD

Monday, September 12, 2011
SO YOU WANT RED HAIR?!!!!
Red hair is definitely a fun fun color! And personally I believe its a very complimentary color on any skin tone! :o And it comes in so many different shades so you're guaranteed to find a GOOD RED on you!
BUT! BEFORE YOU DECIDE TO RUN OUT TO THE NEAREST DRUG STORE AND PICK YOURSELF UP A BOTTLE OF RED HAIR DYE. THERE ARE A FEW THINGS YOU NEED TO KNOW!!
1. RED HAIR FADES THE FASTEST!!! AND IT DEF. TAKES TIME AND DEDICATION TO KEEP YOUR VIBRANT LOCKS AS FIREY AS POSSIBLE.
2. It will NOT show up on black hair unless you use a highlift color and even still, sometimes you're not garaunteed a very vibrant color. Alot of different things can go into this...hormones. hair structure. virgin vs dyed hair...etc etc etc..
I've been dying my hair red on and off for almost 10 yrs? or so?...my first ever dye job was a burgundy red my mom tried on me when I was on 2nd grade XD...needless to say it didnt fly very well since I went to an All Girls Catholic school then. Hurpderp! but it was only the back bottom side of my hair but still! LOL! I've been burgundy to the brightest fire engine red to even shades of pinkish red.
Heres a few rundown of red hair colors I've had in the pass that I am still able to dig up photos of O_O....if I find anymore, I'll definetly try and post them up?...hahaha....And all of these dye jobs were achieved many different ways and using different products. I'll try and briefly talk about each one to kind of give you an idea of the shades or how I achieve them?


the first 2 photos: this was over bleached hair. I have naturally
BLACK hair and I bleached it using vol.40 + bleach
(you can refer to my 'bleaching hair FAQs for Q&A)
and I used SLAT hair dye on the very top one
and on the 2nd photo I used MANIC PANIC Pill Box Red.
WARNING: VEGGIE BASED DYES CAN AND WILL STAIN
YOUR BATHROOM, PILLOW CASES AND ETC IF NOT WASHED OUT PROPERLY
And even when you DID wash it properly
theres still chances that it will stain some items :B...
I think this all depends on how bleached out your hair is and how much
of the dye will hold on your hair.
Always handle with gloves! And keep bleach or bathroom spray handy to spray your bath tub down!

Used L'oriel Feria in Ruby Rush + a hint of SPLAT Cherry Dye mixed
in to add the extra umf of red. Over BLEACHED hair.

This one is my most recent adventures with red.
This is with L'oriel Feria Rush Rush once again over
Blonde x Brown hair.
Only my front bangs were bleached blonde while the rest of my hair was a
medium to light brown....
To achieve my latest hair color I used this box dye:


Now lets talk about products and maintenance! (or mostly products and ways you can do to help maintain your vibrant fierce red hair!!!)
So its basically a no brainer that Red hair fades the fastest! But, like I said, there are ways you can do to help maintain you're red hair longer!
heres my routine for keeping my red hair 8D!
I only wash my hair (as in wet it + shampoo & condition) about only 2-3 times a week. EEK! Yes! Sometimes when I DO have to wet my hair, I use a red hair safe shampoo or color friendly shampoo.
The shampoo and conditioner I use is the John Freida Red one 8B and every so often I have a small bottle of white conditioner where in I put a spoon or two of RED dye in it to kinda just help redeposit color in as I condition my hair.
In between days when I'm not shampooing my hair, I use DRY SHAMPOO. I've heard of this before but it was only recently that I've decided to pick myself a bottle! Tresamme, Suave Professional AND Got2Be now makes Dry Shampoos and are easily accessible to the general public - your local drug store carries them in their hair care line.
How it works? You spray it in your hair in sections as close to the roots as possible and just let it sit for a few mins - see directions per bottle. And brush it away~
For brushing it away I like to use a tight bristled brush like a GROOMING BRUSH (which looks awefully close to a teasing brush! but the teasing brush is thinner. See images below) And if you do not have a tight brittle brush, you can go ahead and use a rat tail comb since its pretty tight together that it helps brush out all that oil from your hair.


And the good thing about DRY SHAMPOO is, it adds volume to your hair! :D win-win situation! The one I'm currently using is the Suave Professional one. I got it since it was on sale at my CVS I was originally going to try out the Tresamme one or the Got2Be brand (since I swear by their hair spray!!!) So far so good its working out just fine for me.
Secondly, you know your hair WILL fade! I usually like to retouch my color every 2 weeks using
a deposit only VEGGIE based dye like Manic Panic or Special Effects. My go to is manic panic VAMPIRE RED. I leave it on for a few mins and rinse out - and tada! Red hair again, now this is only a deposit only color so it just refreshes your shade. Once every 2-3 months or so I like to use a box dye with peroxide to retouch my color and roots.
Roots: since my roots are BLACK, I like to do 2 mixtures. One with vol. 40 to help lift and deposit the color to my roots without having to pre-bleach my roots. If you're not too familiar with the different levels of peroxide just refer to my post on bleaching hair and peroxide levels~
And I use vol. 10-20 for the rest of my hair with the red dye of my choice.
But of course you dont NEED to use box dye or dye + developer, you can just simply keep using the veggie dyes - but keep in mind you WILL need to prelighten your hair and expect your color to fade faster when using deposit only veggie dye.
And please! Remember! Anytime you apply heat or go out in the sun you're hair is susceptible to heat damage and everytime heat is applied to your hair it opens up the hair shaft allowing color pigments to fade and go bye bye~ so please remember to use thermal spray to protect your locks. I use to go to the extreme and even go as far as using color friendly hair spray XD! But that was when I had blues and reds in my hair and was using the deposit only dyes and I was THAT paranoid in keeping my hair as fire engine red as possible. LOL
Sad to say but having high maintenance hair definitely can be costly with all the products you'll be using/needing...but all this is optional! You dont HAVE to do all this or use all this. Sometimes its just fun to throw a bit of color in your hair.
And normally when you let your red hair fade, it can go one or two ways~
it'll fade to a brown shade (if your in the ruby shades) or more of a pinkish-orange tone - strawberry blondeish if your hair is prelightened and you used a lighter shade of red~
I personally have always preferred to be in the more dynamic ranges of red from vibrant ruby reds to something as insane as traffic light red/stop sign red! HAHAHAHA
Good luck~
Wednesday, April 6, 2011
What is Hydrogen Peroxide?
Hydrogen peroxide, developer or activator is the 'white' stuff you use to mix and activate your hair dye to turn it into hair dye prior to slapping it on your hair :D
It is H202, and it is a oxidizing agent that you use to mix with an oxidative agent such as Hair Dye. It supplies the needed oxygen the dye needs to pretty much 'activate' it. PH levels usually range between 2.5 to 4.5 When mixed together with the dye and applied to the hair, the activator reacts and 'opens' up the hair cuticles to allow the hair dye to penetrate the hair shaft. The higher the level of the developer, the higher the your color will 'lift'
You mentioned different names and forms?
Most places/people call Hydrogen Peroxide 'developer' or 'activator' as described above.
It comes in different forms, such as your regular basic liquid cream form (white liquid), gel (clear liquid. I personally dont like using gel as it tends to be runny) and sometimes even a heavier cream version which is best used for when bleaching your brows :D as its a thicker consistency allowing no drips or drops at all!
Levels and their usages:
H202 comes in different levels, the most basic levels you'll be able to access through your local beauty supply sheps are vol. 10-40. and Yes, they DO make developers as high as vol. 50 and 60 BUT are never advisable to be used at all! :O so dont worry about those, unless you are a licensed cosmetologist, you wouldnt be able to access anything higher than 40. And most places wont even sell you vol. 40)
Vol. 10 - Used to enhance ones own natural hair color, it doesnt 'lift' your hair color at all but it definitely works for depositing color and using it to enhance your natural shade. This developer gives the least amount of damage or NO damage at all considering its not even strong enough to open up the hair shaft.
I always suggest this to anyone who has pre-lightened hair and wants to go darker.
ie: When a friend went from black to blonde (and we all know when asians bleach their hair, is usually pretty yellow), she wanted to go 3-4 shades darker but still remain in the blonde range. So we used vol. 10 + the dye. Mixed them accordingly and reapplied to her hair.
Vol. 20 - most standard of the developers, this is the one most commonly used in boxed dyes (usually the ones that comes in the boxes are alittle bit more dilluted), this is also the developer used for full gray coverage. This would lift your hair 2 shades.
its strong enough to open up the hair cuticles and deposit the dye just enough but not too strong that it'd completely open up the hair shaft.
Vol. 30 - Use this for alittle bit more of a KICK to your hair lifting, this would lift you up atleast 3 volumes and is most commonly used with 'Hi Lift Colors' Most commonly adviced when using L'oriel high lift colors, per box instruction
Vol. 40 - Highest max lift in 1 step. This would lift you a nice 4-5 shades in one step.
I highly advice this for anyone going Blonde :B since it def helps lift you up a good 4-5 shades.
I wont go into detail in regard to 'how do I lift my hair to blonde blablabla, atleast not on this post. :D I'll go into it much more detailed in a different post. This is just a basic break down on Developers and what they do and whatnot.
What are the 'hair levels' you're talking about?
Your hair comes in 10 different 'shade levels'. Most Asians are either a level 1 or 2. Which is Black or Dark Brown. When 'lifting' your hair, you can use this chart as a guide to see how 'high' you wanna go:
Photo provided from Clairolpro.com

Will using a higher level above 10 be damaging to my hair?
Yes. The higher the level you're using, the stronger the chemical is, harsher it is on your hair, seeing as the higher the level the more it opens up your hair shaft.
As seen in the photo below, provided by hairfinder.com (found via google images)
the higher the developer, the more it 'raises' or opens up the hair to allow maximum porosity. The stronger the developer, the more it blasts or raises the hair cuticle which in turn, does damage your hair more and more making your hair feel more dry and course since you're taking out all that moisture and nourishment. So I always suggest babying your hair with masks and deep conditioners to try and close the cuticle and restore moisture.
When looking for a conditioner or hair masks, try to find ones that has 'Keratin Protein' in it.
keratin protein is basically the compound your hair is made out of and is very healthy for your hair to try and get as much of that keratin protein back into your hair.